

Toppay USDT transactions are irreversible. There is no support ticket that undoes a transfer sent on the wrong network or to a wrong address — not on this platform, not on any platform, because the limitation is in the blockchain, not the service. Everything on this page exists to make sure that never happens to you.
Read this fully before your first USDT transaction. It takes three minutes and it is the highest-value three minutes on this site.
The single most important concept: networks
USDT (Tether) is not one thing. The same token is issued on several separate blockchains, and each one is a completely independent system:
- TRC20 — on the Tron network. Addresses start with
T. Low fees, fast, the most commonly used for USDT in India. - ERC20 — on Ethereum. Addresses start with
0x. Higher fees, especially when the network is busy. - BEP20 — on BNB Smart Chain. Addresses also start with
0x, which is exactly why ERC20 and BEP20 get confused.
Sending USDT on one network to an address that expects another usually means permanent loss. The ERC20/BEP20 case is the most dangerous because the addresses look identical in format. The only thing that distinguishes them is the network setting you choose at send time.
Before a USDT deposit
- Open your signed-in account and find the deposit screen. Read the network shown there. Do not rely on memory or an older screenshot.
- Copy the address using the copy button, never by typing it manually.
- Set the same network in your sending wallet or exchange. Match it exactly — TRC20 to TRC20, not “Tron” to “Ethereum”.
- Verify the full address after pasting. Compare the first six and last six characters against the source, and ideally a section from the middle. Clipboard-hijacking malware swaps addresses on paste, and it produces an address with a similar-looking start and end.
- Send a small test amount first if this is a new address. Confirm it arrives before sending the remainder.
- Save the transaction hash (TxID) that your sending wallet gives you. Without it, nothing can be traced.
Understanding confirmations
After you send, the transaction enters the network and waits for blocks to confirm it. TRC20 usually confirms within about a minute; ERC20 depends heavily on network congestion and gas price.
A transfer shown as “pending” can be waiting on either of two separate things: blockchain confirmations, or the platform’s own crediting process after confirmations complete. These are different stages. Check the blockchain explorer for the first, and your dashboard for the second.
Do not send a second transaction while the first is pending. This is the most common and most expensive mistake made in this entire category. If the first transaction eventually completes, you have now sent twice.
USDT to INR
The calculator on this page gives you a quick estimate of what a USDT amount is worth in rupees at a rate you enter. Use it for planning — the actual rate, fees and final credited amount for your transaction are whatever your signed-in dashboard shows at the moment you confirm. A dedicated converter with more explanation is on the USDT to INR page.
Before a USDT withdrawal
- Confirm the destination address belongs to a wallet you control.
- Confirm the destination wallet supports the network you are withdrawing on.
- Check the minimum withdrawal amount and the network fee shown on the withdrawal screen.
- Paste the address, then verify start, middle and end characters.
- Withdraw a small test amount first when using a new address.
Full detail is on the Toppay withdrawal guide.
Troubleshooting a stuck USDT transaction
- Sent, nothing received — look up your TxID on the correct blockchain explorer. If the explorer shows it confirmed to the right address, the issue is crediting, not the transfer, and support can act on the TxID.
- Wrong network used — check whether the receiving address exists on the network you sent on. In most cases these funds are not recoverable. Report it with the full TxID anyway.
- Wrong address entirely — if the address belongs to another exchange, contact that exchange with the TxID. Otherwise recovery is not possible.
- Amount below minimum — deposits under the stated minimum may not credit automatically.
Safety rules for USDT
- Never share your wallet seed phrase or private key with anyone, for any reason.
- Never let anyone screen-share while you access a wallet or the platform.
- Beware “address poisoning”: a dust transaction from an address resembling one of yours, hoping you copy it from history later. Always copy from the source, never from transaction history.
- Anyone offering to double your USDT is running a fraud. There are no exceptions to this.
How to Deposit on Toppay
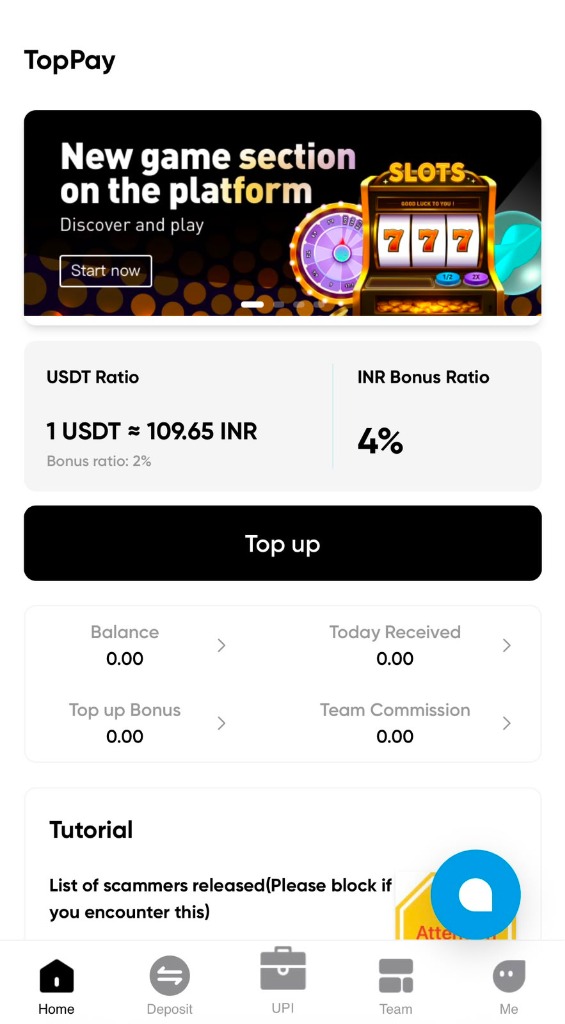
This guide covers the general checklist for a Toppay deposit. Available payment methods differ between accounts and change over time, so this page describes the checks that always apply rather than promising a specific button. For crypto specifically, use the USDT deposit guide instead — the risks there are different.
Step 1: Sign in first, always
Open toppay-app.online and sign in. Never begin a deposit from a link, a QR code, or payment details someone sent you in a message — not even from an account that appears to be official.
This is the single rule that prevents the most common deposit fraud. Attackers do not need to break the platform; they only need you to pay a different destination while believing you are paying the platform.
Step 2: Use the deposit option shown in your account
Open the deposit section of your signed-in dashboard. Whatever methods appear there are the ones enabled for your account. If a method you expected is not visible, it is not currently available to you — do not look for an alternative route outside the platform.
Step 3: Read the current instructions on screen
Payment details are not permanent. Account numbers, UPI IDs, wallet addresses and reference formats can be rotated. Always read what is on your screen right now.
Specifically, do not use:
- A screenshot from a previous deposit, yours or someone else’s.
- Payment details from a chat group.
- Details from a blog, video or forum post.
Details that were correct last week can be wrong today, and money sent to an outdated destination is extremely difficult to recover.
Step 4: Verify before you confirm
Before you authorise the payment, check each of these:
- Amount — matches what you intend, including any minimum.
- Recipient — matches exactly what your account screen displays.
- Reference / remark — if the platform asks for a reference code, include it exactly. Deposits without the correct reference often need manual resolution.
- Method — matches the method selected in your account.
A minute spent on this step is worth more than any support ticket afterwards.
Step 5: Save proof of the transaction
Immediately after paying, record:
- The transaction reference or UTR from your payment app or bank.
- The exact amount and the time.
- A screenshot of the confirmation screen.
Keep these until the deposit is reflected in your account. If a query is needed later, this is the evidence that resolves it quickly.
Step 6: Check the status before doing anything else
Return to your dashboard and check the transaction status. Statuses generally mean:
- Pending — received, not yet finalised. Wait.
- Completed / Success — credited to your balance.
- Failed / Rejected — not credited; check the stated reason before retrying.
Never repeat a payment while the first is pending. Duplicate deposits are the most common self-inflicted problem in this process, and reversing one takes far longer than waiting did.
If a deposit does not arrive
- Confirm the money actually left your account — check your bank or payment app.
- Confirm the destination you paid matches what your dashboard displayed.
- Check whether the amount met any stated minimum.
- Allow the stated processing time before escalating.
- Contact support with the reference, amount and time — and nothing else. Never send your password, OTP or MPIN.
See Toppay support and customer care for the correct channels.
Deposit warning signs
- Someone messages you offering a “bonus” for depositing to a different account.
- You are asked to pay an individual’s personal account rather than the destination on your screen.
- You are told to pay an additional fee to “release” a deposit that already went through.
- You are pressured to act quickly before an offer “expires”.
All four are established fraud patterns. Read Toppay real or fake for the full verification checklist.
How to Deposit USDT on Toppay
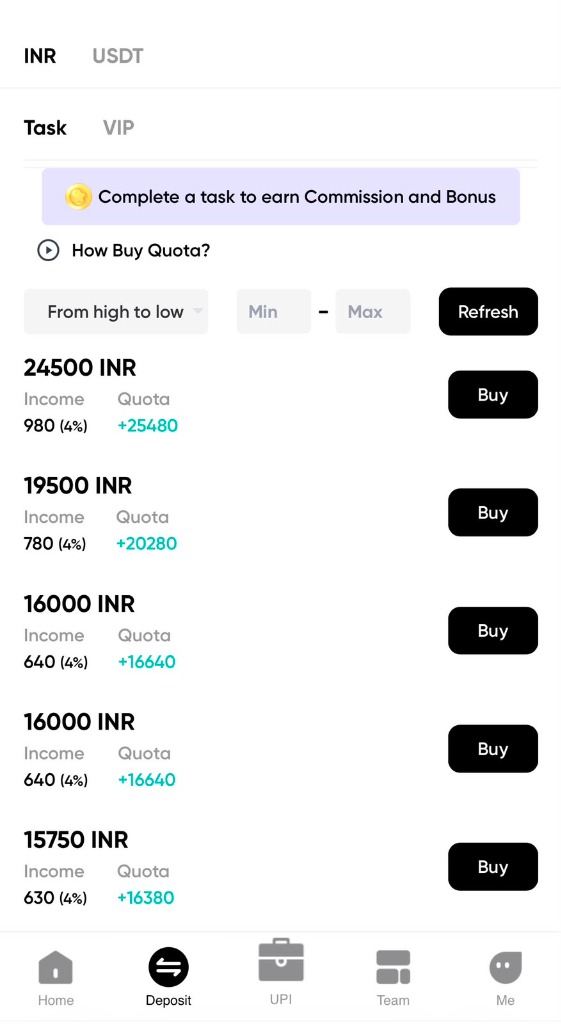
A Toppay USDT deposit is irreversible once broadcast. There is no cancel button and no support action that reverses a blockchain transaction. This guide is a checklist — work through it in order, every time, including when you feel confident.
Step 1: Open the deposit screen in your account
Sign in at toppay-app.online and open the USDT deposit section. Two pieces of information appear there and both matter equally:
- The network (for example TRC20).
- The wallet address for that network.
Never use an address from an old screenshot, a chat message or another page. Deposit addresses can be regenerated, and a stale address may no longer be monitored.
Step 2: Set the network, then copy and verify the address
Select in your sending wallet the same network your deposit screen named, copy the address with the copy button rather than typing it, and after pasting compare the first six characters, a block from the middle, and the last six against the original.
The middle comparison is the one people skip and the one that matters — address-swapping malware picks a replacement with a similar-looking start and end. If you want the full explanation of how the networks differ and why a mismatch is unrecoverable, that is covered in the Toppay USDT guide. This page assumes you have read it and focuses on what happens once you press send.
What the fee will actually be
The fee is charged by the blockchain, not by the platform, and it varies enormously by network. Approximate figures at the time of writing:
- TRC20 (Tron) — typically around 1 USDT, sometimes free if your wallet holds enough staked energy. This is why it dominates USDT transfers in India.
- ERC20 (Ethereum) — commonly several dollars, and during congestion it can exceed the value of a small transfer entirely.
- BEP20 (BNB Smart Chain) — usually well under a dollar.
These move with network conditions, so treat them as orders of magnitude rather than quotes. The practical rule: on a small deposit, an ERC20 fee can consume a painful share of the amount, so check the fee your wallet displays before confirming, not after.
How long each stage actually takes
Knowing the normal timings is what stops you from panicking — or from sending twice.
- TRC20 — confirmation usually within about a minute.
- BEP20 — typically a few minutes.
- ERC20 — anywhere from under a minute to considerably longer, depending on congestion and the gas price your wallet chose.
After on-chain confirmation there is a second, separate wait while the platform credits your balance. Confirmed on the explorer but not yet showing in your dashboard is normal for a short period and is not an error.
A worked example
Suppose you are depositing 100 USDT over TRC20:
- Deposit screen shows network TRC20 and an address beginning with
T. You copy it. - In your sending wallet you select TRC20, paste, and check start, middle and end.
- You send 10 USDT first as a test. Your wallet shows roughly 1 USDT deducted as fee.
- Within about a minute the explorer marks it confirmed. Shortly after, 10 USDT appears in your balance.
- You now know the route works. You send the remaining 90 USDT the same way.
The test cost you one extra fee. Against the alternative — discovering a network mismatch with the full amount already sent — that is the cheapest insurance available in crypto.
Step 3: Save the transaction hash before you do anything else
Your sending wallet produces a transaction hash (TxID) the moment the transfer is broadcast. Copy it somewhere you will still have it in an hour — a note, not just the wallet history.
This is not bureaucracy. The TxID is the only identifier that exists for your transfer. Checking whether it confirmed, proving you sent it, and any support query all begin with it. A deposit query without a TxID cannot be investigated by anyone, however willing they are to help.
Step 4: Read the explorer correctly
Open the explorer matching the network you used — Tronscan for TRC20, Etherscan for ERC20, BscScan for BEP20 — and paste the TxID. You will see one of three states:
- Pending / unconfirmed — broadcast but not yet in a block. Nothing to do but wait.
- Confirmed — settled on the blockchain. The transfer itself is complete.
- Failed — never executed, usually insufficient gas. Your funds remain in your wallet, minus the fee already spent.
The distinction that matters: confirmed is about the blockchain, not about your balance. Crediting is a separate step that happens afterwards. Seeing confirmed while your dashboard still shows nothing is the normal middle state, not a fault.
The mistake that costs the most money
Between broadcast and crediting there is a gap, and that gap is where the expensive decision gets made. A first transfer looks stuck, so a second one goes out — and then both confirm.
Sending twice is not a way to speed anything up. There is no mechanism by which a second transfer accelerates the first. Before you touch your wallet again, look up the original TxID. Either it is pending, in which case waiting is the only correct action, or it is confirmed, in which case the transfer already worked and a second one is pure loss.
Troubleshooting
- Explorer shows confirmed, balance not updated — allow processing time, then contact support with the TxID, network, amount and time.
- Wrong network used — report immediately with the TxID. Recovery is often impossible, but the TxID is the only thing that gives any chance.
- Explorer cannot find the TxID — you are likely checking the wrong network’s explorer. Try the one matching the network you actually selected.
- Amount below minimum — small deposits may not credit automatically and need manual handling.
Security reminders
- Never share your wallet seed phrase or private key. No support process requires it.
- Never let anyone screen-share while you access a wallet.
- Always copy the deposit address from the account screen, never from your transaction history — address-poisoning attacks plant look-alike addresses there.
For network background and withdrawal checks, see the Toppay USDT guide and the withdrawal guide.
Toppay Withdrawal Guide
A Toppay withdrawal moves funds out of your account balance to a destination you control — a bank account, a UPI ID, or an external USDT wallet, depending on what is enabled for your account. This guide covers what to verify beforehand, what the status values mean, and what to do when a withdrawal is delayed.
Before your first withdrawal
Three things are worth completing before you need them urgently:
- Complete any verification your account requires. Withdrawals are commonly held pending verification, and doing it in advance avoids a delay at the worst moment.
- Add and confirm the destination. Bank account, UPI ID or wallet address — add it early so it is ready.
- Do a small test withdrawal. Confirm the full round trip works before you rely on it for a larger amount. This is the most useful single test of any payment platform.
Step 1: Check limits and fees first
Open the withdrawal screen in your signed-in account and read:
- Minimum withdrawal amount.
- Maximum per transaction and any daily cap.
- Fee — flat, percentage, or a network fee for crypto.
- Expected processing time.
Calculate what will actually arrive after fees before you submit, so the received amount is never a surprise.
Step 2: Verify the destination carefully
For a bank or UPI withdrawal: confirm the account number, IFSC and name match your own account exactly. Withdrawals to an account in a different name are frequently rejected, and the funds then take longer to return.
For a USDT withdrawal: the same rules as deposits apply in reverse and with equal force:
- Confirm the receiving wallet supports the network you are withdrawing on.
- Paste the address rather than typing it.
- Verify the first, middle and last characters against the source.
- Send a small test amount to any new address before a large withdrawal.
Details on networks are in the Toppay USDT guide.
Step 3: Confirm and record
Submit the withdrawal, confirm with your MPIN or OTP if prompted, and immediately record the withdrawal reference, amount, fee, destination and time. Screenshot the confirmation screen.
One rule: your OTP goes into the platform’s own screen and nowhere else. If anyone asks you to read out an OTP or forward it, that is fraud, without exception.
Step 4: Understand the status
- Pending / Processing — submitted and queued. Normal.
- Under review — held for a routine check. Usually resolves within the stated window.
- Completed — sent from the platform. Bank credit can still take additional time on the bank’s side.
- Failed / Rejected — not sent. The funds should return to your balance; check the stated reason.
Common reasons a withdrawal is delayed
- Account verification is incomplete.
- Destination details do not match your account name.
- The amount is below the minimum or above a limit.
- Bank processing windows — weekends and holidays add time.
- Blockchain congestion for crypto withdrawals.
- A routine security review after a password change or a new destination was added.
If a withdrawal does not arrive
- Check the status in your dashboard first.
- If marked completed, check the destination account or the blockchain explorer using the reference or TxID.
- Allow the full stated processing window plus bank settlement time.
- Contact support with the reference, amount, destination and time.
- Never share your password, OTP or MPIN during this process.
Withdrawal fraud patterns to recognise
These target people who are already anxious about a pending withdrawal, which is what makes them effective:
- “Pay a fee to release your withdrawal.” A legitimate fee is deducted from the withdrawal, never collected as a separate upfront payment.
- “Send your OTP so we can process it faster.” Never legitimate.
- “Install this app so we can help.” Remote-access and screen-share tools let an attacker operate your device directly.
- “We can recover your stuck funds for an advance payment.” A recovery scam, targeting people who have already lost money.
See Toppay real or fake for the complete verification checklist and customer care for official channels.
USDT to INR Converter
Use the calculator above to estimate what an amount of USDT is worth in Indian Rupees. Enter the USDT amount and the rate you want to test, and the INR value updates instantly. This is a planning tool — the rate, fees and final credited amount for an actual transaction are whatever your signed-in Toppay account displays at the moment you confirm it.
What is USDT?
USDT (Tether) is a stablecoin designed to hold a value close to one US dollar. Unlike Bitcoin or Ethereum, its price is not intended to move much — it exists so people can hold and transfer a dollar-denominated value on a blockchain without exposure to crypto volatility.
“Close to” is not “exactly”. USDT trades slightly above or below $1 depending on market demand, and that small movement is one reason the INR rate you are quoted shifts.
What determines the USDT to INR rate?
Three factors combine:
- The USD to INR exchange rate — the base. When the rupee weakens against the dollar, USDT costs more rupees.
- The USDT premium or discount — local supply and demand. In periods of high buying interest, USDT often trades at a premium above the plain USD/INR rate; when selling pressure dominates, it can trade below.
- Platform spread and fees — the difference between the buy and sell rate quoted to you, plus any explicit transaction or network fee.
This is why the rate you see in one place will not exactly match another, and why the rate you saw an hour ago may no longer apply.
How to use the calculator
- Enter your USDT amount in the first box, or drag the slider.
- Enter the rate you want to test in the rate field (for example 112 for ₹112 per USDT).
- Read the estimated INR value.
To work backwards from a rupee target, divide your target amount by the rate. ₹50,000 at ₹112 per USDT is roughly 446 USDT.
Estimate versus actual amount
The calculator result is a gross figure. The amount that actually lands in your account is typically lower, because of:
- Network fee — charged by the blockchain when sending, deducted from the transfer.
- Platform fee — if applicable to your account and transaction type.
- Rate movement — the gap between when you check and when the transaction is confirmed.
Always compare the calculator estimate against the final figure your dashboard shows before you confirm. If the two differ significantly, stop and find out why before proceeding.
Network matters as much as rate
Before converting or transferring, confirm which USDT network you are using. TRC20, ERC20 and BEP20 are separate blockchains, and sending across a mismatch typically means permanent loss — a far more expensive mistake than any rate difference. The Toppay USDT guide covers network selection in full, and the USDT deposit guide gives the step-by-step checks.
Practical tips
- Compare the quoted rate against the broader market before a large conversion.
- Account for the network fee in your planning, not just the headline rate.
- For a first transaction with a new address, test with a small amount regardless of the rate.
- Record the rate, amount, fee and transaction hash for every conversion — it makes any later query far easier to resolve.
Disclaimer: यह calculator केवल अनुमान (estimate) के लिए है। यह financial advice नहीं है। Crypto rates लगातार बदलते हैं — transaction से पहले हमेशा अपने signed-in dashboard में current rate और final amount verify करें।
Last updated: 2026-08-22 · Published by TopPay · Read the disclaimer